Exporting your Tracks to Send to Your Engineer (Pro Tools Edition)
Exporting your Tracks to Send to Your Engineer (Pro Tools Edition)
So, you want an engineer to mix your song proper. If you have found this article, chances are you think exporting your multitracks from Pro Tools is intimidating, complicated, or you have just never done it before. Keep in mind, this is for Pro Tools ONLY - Different DAWs have different methods. Follow the steps below and you're be done in no time.
Prep the Session for Exporting Tracks
These first 3 steps will save you a lot of headache down the line.
1) Save a new version of your session to back up your existing work using "File" > "Save As".
This way if you goof anything up, you’ve got a backup of your session as it is today.
2) Label the tracks in your session
It’s best to do this before you print stems. When rendering tracks, the filenames your engineer will be working with will inherit the naming you have given the tracks prior to export. Proper labeling help them and you greatly by reducing any confusion or added turnaround time as a consequence. For example, if the engineer is starting your mix with filenames that read like “Lead Vocal” and “Synth Bass” instead of “Audio 1.dup1.dup.1” or “Inst 4”, they will have to parse through the files themselves to discern what's what.

3) Bypass any effects you instantiated as inserts directly on your vocal tracks.
More than likely your engineer wants you to send un-effected, or “dry”, vocal tracks. The reason for this is they need to clean-up the source audio with editing and EQ before applying compression, saturation, reverb, delay, modulation, other effects etc. If you leveraged bus/aux tracks for all of your effects, you are one step ahead of the game! Just remove the EQ/compression you have applied in post to the vocal track. You can reference this blog post on bus/aux tracks for more on this subject.
Consolidate, Commit, and Export
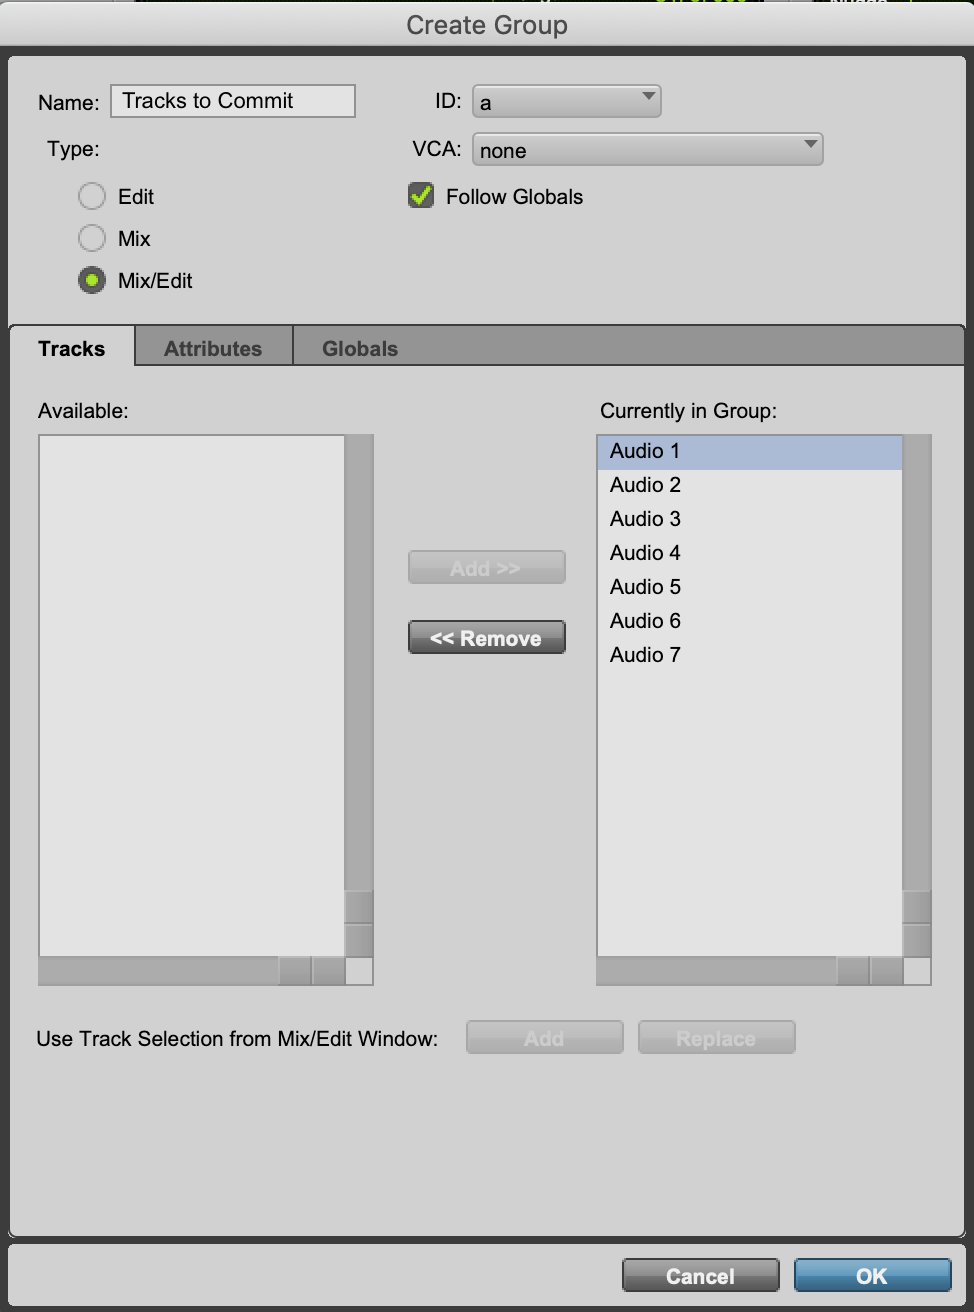
4) Select all of the tracks you want to export. Create a new Group for these tracks.
Create a group of these tracks with “Command+G” on Mac/”Control+G” on PC. Give it any name, doesn’t matter. It's just for ease and reducing error in the next step.
5) Make an edit selection of the entirety of your song timeline using the new Group.
From when the session start at 0:00:00 to when the music ends and your last reverbs/delays have faded out.

6) Commit Your Tracks.
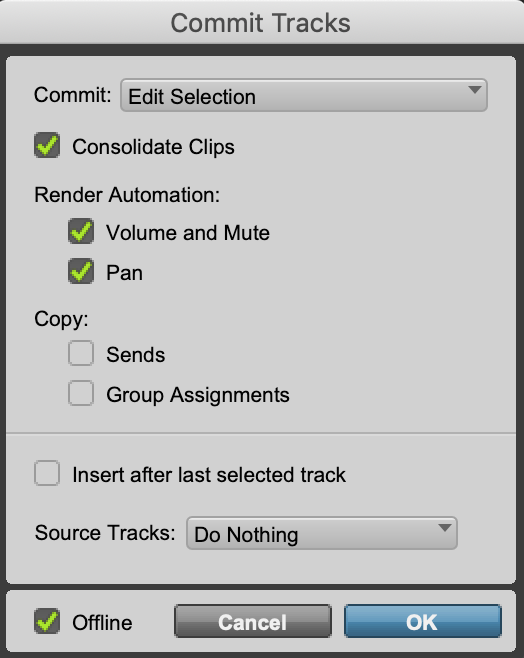
Press “Option+Shift+C” on Mac/”Alt+Shift+C” on PC to open the Commit Tracks window. Ensure the settings are selected as shown:
- Commit: Edit Selection
- Check the boxes for “Consolidate Clips”, and “Render Automation” of “Volume and Mute” and “Pan”
- Source Tracks: “Do Nothing”
Click "OK"
7) Once rendered, create a new group
When the tracks finish rendering, the new tracks will be pre-selected. Immediately create a new group and label it what you will so you can easily complete the final step!
... Ok there is one optional step for bonus points. If you don't care about efficiency, head to step 8).
7A (optional) Bulk rename your new clips to clean up the naming
Click your exported tracks to select them (again, an active group makes this one-click) and bulk-rename the clips all at once by pressing ”Control+Shift+R”. This will clean up the “.cm” that Pro Tools appended to the end of all the clips. Ensure the settings are selected as shown:
- Deselect “Replace” checkbox
- Select “Trim” checkbox. Keep “From Beginning” set to 0 and change “From “End” to 3
- Select “Add” checkbox and enter into the “Suffix” field something like “_TRACK”. This way, you avoid Pro Tools throwing you an error like “this clip name already exists” while keeping the file names organized
7B (optional) Save this bulk clip renaming setting as a preset so you can just select it from the preset dropdown in the future!
8) Export your clips as .WAV files
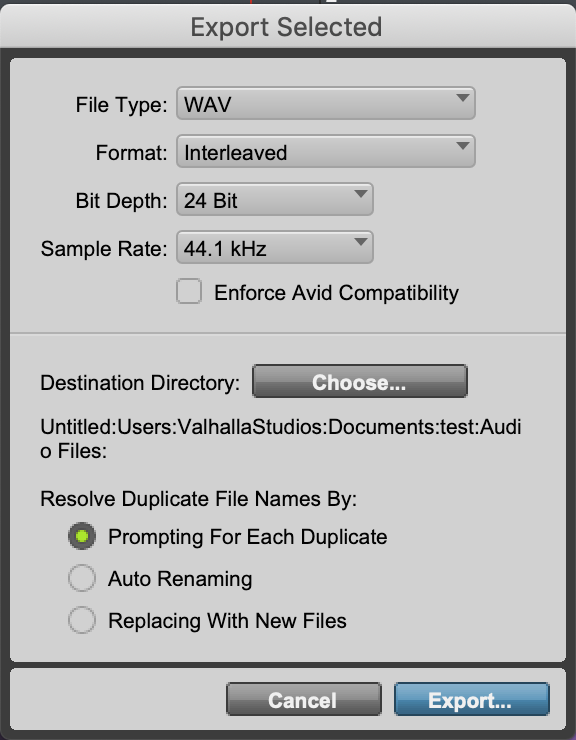
Finally, use “Command+Shift+K” on Mac/”Ctrl+Shift+K” on PC to export your clips as files. Choose a location for the exported stems, like a new folder within your Pro Tools session parent folder, your desktop, or wherever you’d like to keep your steps. In the Export clips window, ensure the settings are selected as shown:
.ZIP up that folder and sent it to your engineer using Google Drive or WeTransfer!
When you're ready, feel free to contact us and we can get started! If You're local to New York City or Brooklyn, we would be happy to have you drop by.

As for what's up like, 'RIGHT NOW' right now?

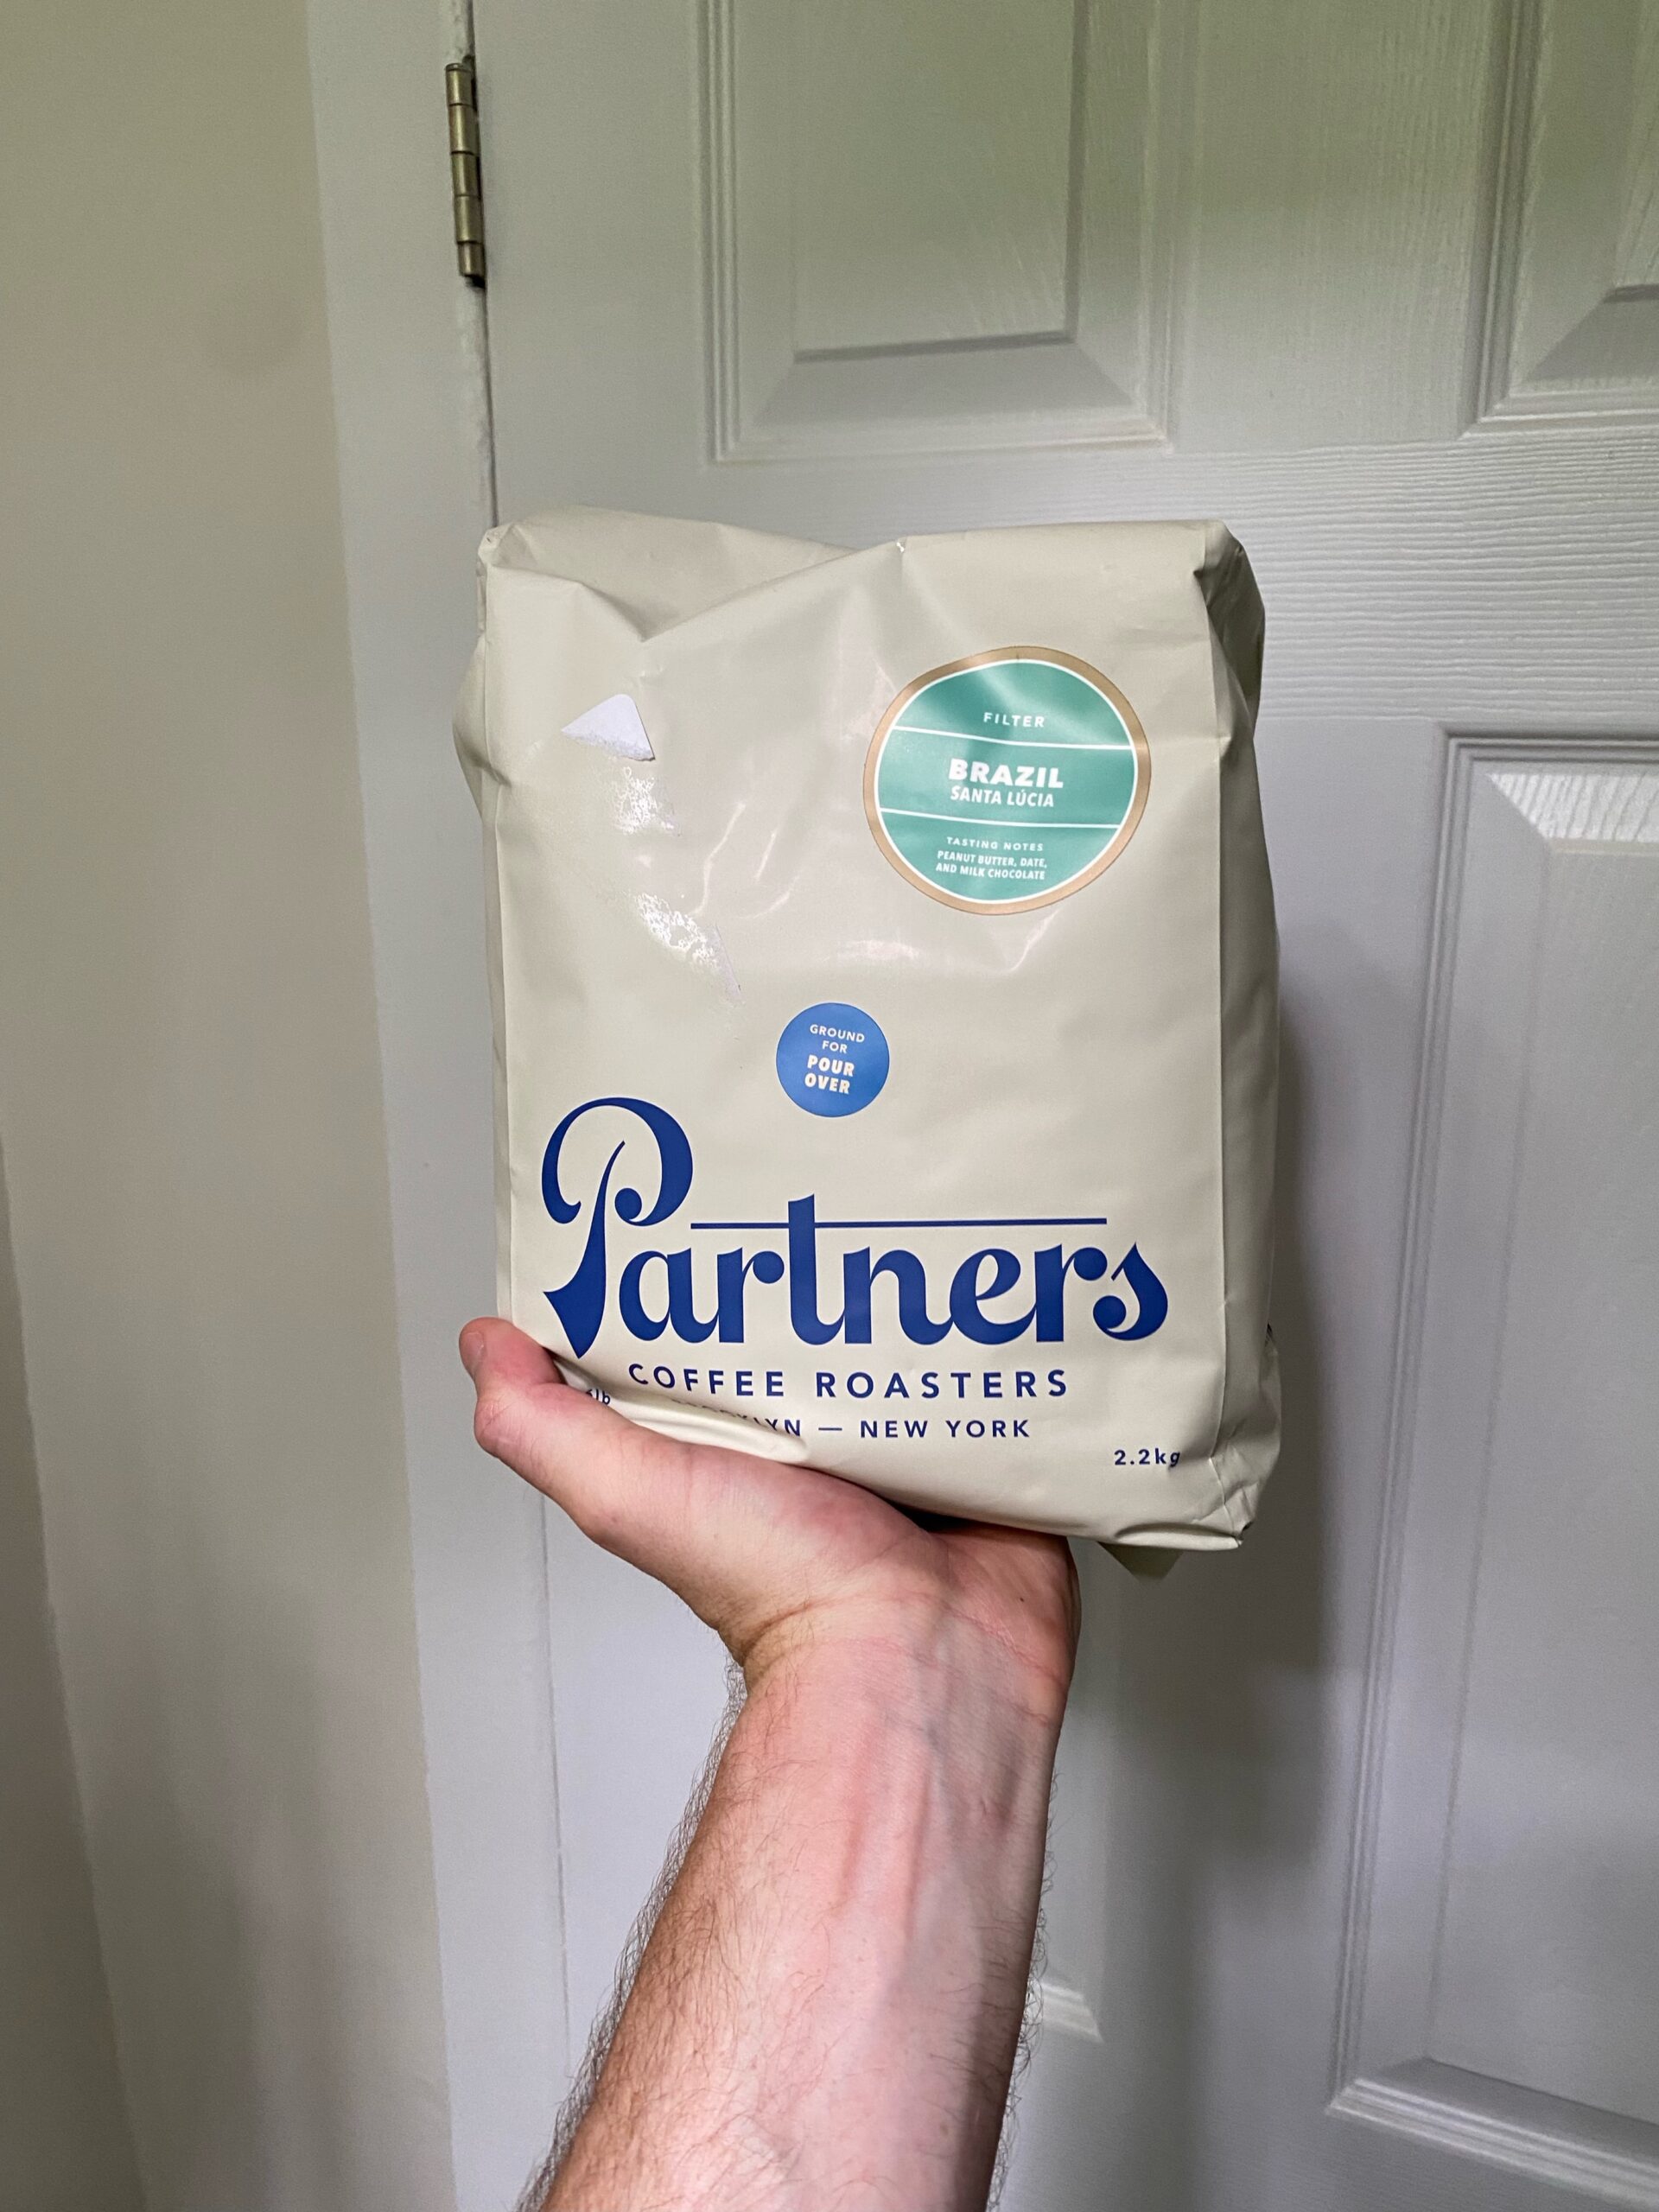
I know that caffeine is the bad guy right now and mushroom/green powder drinks are all the rage right now but let's face it, the hook is in and I'm not mad about it. Instead of paying $4-$7 for a coffee from dunks or bucks, I make mine at home. If you're interested in getting GOOD BEANS on the cheap, by bigger bags! I get Brooklyn-based Partners Coffee 5lb bags, and Jō Coffee 12oz. bags sold in wholesale quantities. Each cup I make at home costs somewhere in between $1.10 and $1.35, and it's not cheap burned coffee from the tin or instant coffee.
If you want to work with us or just shoot the sh*t, hit our socials, send us an email, use our contact us form, whatever works for you!
Ciao ciao.
